Sunday, September 21, 2025

Meshtastic 64 - A meshtastic radio for the Commodore 64


For this project I designed and built a meshtastic radio that plugs directly into the Commodore 64. My goal was to release this at the VCF Midwest show (VCFMW) in Chicago on September 13th and 14th. I barely made it!


meshtastic 64 for the commodore 64
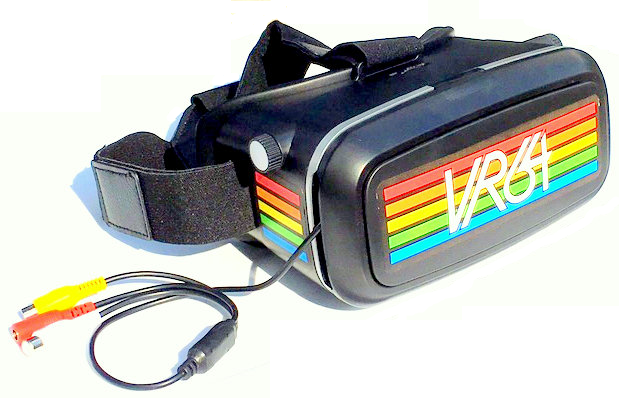
The finished module plugs into the Commodore 64 User Port


The idea

I had heard some things about meshtastic, but I was no expert. As I looked into it, I learned that it is an open source, decentralized, peer-to-peer, text messaging network designed for long-range mesh communication.

This seems to attract people that are either interested in the technology, interested in a decentralized / non-monetized communication system, interested in emergency communication - or any combination. My take was a nerdy 8-bit project to get a 1980s computer on the mesh.

I bought some modules off Amazon and started getting results with the Heltec LoRa V3, so that became my platform.


Prototyping

I then started working on a proof-of-concept version. I wanted to connect using a serial port which the meshtastic supports. I did need to find two IO pins to use and after some investigation settled on pins 45 and 46 of the Heltec.

The meshtastic typically communicates using protobuf commands. I spent some time untangling these, but soon shifted to the SERIAL>MODE>TEXT_MODE setting. This focuses on simply sending and receiving text through the meshtastic primary channel.

Soon I had a proto board which was sized to fit in a reproduction Commodore 64 cartridge shell. The shell's recessed label area is untextured and made a perfect lens over the little display.


Coding on the Commodore 64

I worked on a program for the Commodore 64. I chose to write the program in BASIC because it was quick for me to develop with, very retro, and the speed needed for text input and printing to the screen was acceptable. I did much of the programming on an actual Commodore 64, but transitioned to CBM Program Studio on my laptop while traveling.

Initial Programming Setup
First Programming Setup


Interface PCB design

Then I laid out the PCB. I worked hard to get the display lined up with the "window" in the reproduction cartridge cases and position the Heltec so that the USB C would be accessible to the side. I also added a big rectangular cutout to the center of the PCB for an internal battery. I even added some fun LEDs that could be controlled by the Commodore 64.

When I got the boards, they looked great, fit well, but all the connections were mirrored. Ugh!


An ugly twisted wiring of the connector did prove it worked. I experimented with options of soldering the Heltec to the PCB. A cut cross-section of the plastic cartridge shell confirmed a method where the Heltec module was aligned right below the top bezel. So, it was off to design and order round two of the boards.


Refining the program

I worked further on the Commodore 64 code, now having two commodore 64s that could talk to each other. I experimented with PETSCII images for emojis and custom images, however the full PETSCII graphic character set trades off the lower case characters on a Commodore 64.


In the end, I favored upper and lower case text communication between the Commodore 64 and others on the meshtastic network. To do this, the program must convert between ASCII and PETSCII. I used the commodore Upper and Lower case character set and provided no support for PETSCII graphics in the standard text messages.

But I couldn't resist getting some PETSCII art in this project, so implemented a separate commodore only PETSCII graphics message and include an editor, eight slots to hold graphics, SAVE and LOAD commands, and even a method to save incoming PETSCII graphics for editing or resending.


Finishing the case

To finish the case design and build, I cut slots for the USB C on the side, drilled holes to mount the antenna on top, and worked on how to get button presses to the front surface of the cartridge shell. My solution used acrylic rods cut to length for use as extended button actuators. I used my drill press to drill corresponding holes in the front bezel for the rods to protrude through. To hold the rods straight and in place, I glued in O-rings inside the shell which worked great and did not muffle the button click.


Race to the VCFMW 2025 show

Like any good hobby project, time was running out. The corrected PCBs arrived just 10 days before the show. I worked on building 20 units to take to the show. A couple of my buddies came to town a day before the show. I quickly finished a manual, a disk with the software, made a table info stand, and then made my buddies fold boxes and label disks. (We did have a nice BBQ dinner first) We completed 19 units for the show - which I was very happy with.


At the Show

The show went great. Many friends brought separate c64s to help test and play with the meshtastic 64 during the show. VCFMW had set up a special meshtastic channel for the show and there were up to 200 nodes all talking at once! The Commodore 64s were right in there, sending and receiving all the messages. Lots of people stopped and discussed the project with me.


Because the meshtastic 64 modules have a built-in rechargeable 1000mAh battery, they can operate independently from the c64 like a typical meshtastic radio. That meant I was able to keep up with the conversations when I wasn't on the show floor - even catching up on overnight messages over my Sunday morning breakfast.


Checking overnight messages at breakfast Sunday morning


Final thoughts

I think the meshtastic 64s worked very well. The BASIC program was able to keep up with the heavy traffic at the show. My tester friends were able to find a few software bugs which were easy enough to fix. We were able to have some fun sending small PETSCII artwork back and forth but it did look like lots of garbage to everyone else.

Overall the response at the show was great - seems others enjoyed seeing this as much as I enjoyed putting it together.


-----------------------------------------------------------------------------------


PS - If you want a fun project, make your own! If you are looking for a prebuilt unit, see this link:

Sunday, August 9, 2020

Stupid PET Tricks - adding sound and joysticks to a PET 2001 and making games work with it.


Commodore PET 2001 games with sound and joysticks!

This project adds sound and joystick(s) to the original 1977 commodore PET 2001 computer.  I’ve used the techniques that were developed by user community soon after the PET 2001 release.  I’ve found many games with sound but only a few with joystick support.  I modified some games to add joystick support. YouTube video of the project.


YouTube video of the project
 
Background
The commodore PET 2001 was released in 1977, the same year as the Apple II and the TRS-80 Model I.  Byte magazine called these three computers the “1977 Trinity” noting that these were the first pre-assembled computers available to the public.

Interestingly, only the Apple II was designed with games in mind.  It supported color when hooked to a color TV, had a built-in speaker, and supported paddle controllers.  The Steves had previously built a Pong game for Atari and used that game as one of their design targets when creating the Apple II.


PET 2001 CB2 Sound modification
The PET 2001 was released with no speaker and no clear method to add sound.  Of course, the PET user community quickly came up with a solution.  This solution used the CB2 pin on the user port and therefore it was dubbed “CB2 sound”.  This proved so popular, that commodore adopted this design on future PETs.
CB2 Sound modification from Cursor #3 September 1978

Link to version with the resistor (what I implemented)


PET 2001 Joystick modification
The PET 2001 was released with no joystick support.  Again, the user community responded with user port connection methods, but in this case, multiple standards emerged.  I first implemented Chuck Johnson’s dual joystick design from Volume 1, Issue 2 of the 1979 commodore PET Users Club Newsletter - however I couldn’t find any software that used this design!  Next, I implemented the more common LEFT=PA1, RIGHT=PA2, FIRE=PA5 design.  I even found one more different design in the 1978 Volume 0, Number 3, PET User’s Group Newsletter.


PET 2001 Games using Sound and Joystick(s)


Cosmic Cosmiads


This is an excellent Galga-like game - all in PETSCII!  With a simple POKE before running, this game already supported the LEFT=PA1, RIGHT=PA2, FIRE=PA5 joystick design.


Galaxy Invaders
This game was often traded as SPACE INVADE.PRG.  It features pixel perfect movement on a character-based display!  I was able to modify the game to work with the LEFT=PA1, RIGHT=PA2, FIRE=PA5 joystick design.  As I was editing the program, I noticed that the intended name, “Galaxy Invaders” should be printed on the first run.  The traded version did not print this due to a score being in memory.  I was able to clear this so that the true game name is shown at startup.


PONG!
Every classic computer and game system needed a Pong version, right?  This one was published in the Cursor #29 tape in 1982.  I adapted it to support the Chuck Johnson dual joystick design.


Saturday, September 9, 2017

Street Defender VR64 Video Game


The year is 1986 and modern man has made a mess of it!

Space aliens recovered the Voyager 1 spacecraft, listened to “Jonny B Good”, and immediately invaded earth’s cities with their green exoskeleton bug warriors. The robots created to make mankind’s lives more comfortable have decided they aren’t comfortable, and have risen against man. And the Central Asia Ninja Team (CANT) grew angry at the repeated portrayal of Ninjas as silent, expendable warriors in video games, so it launched an attack of its massive blue Ninja squad who have taken a vow of silence. Apparently, irony isn’t well understood in the Ninja culture.

Mankind has set up Street Defenders on every street corner to fight the invaders. They are trained to fight the invaders as long as they can before being “retired”.

You are Street Defender number C-64. 

To look for your enemies, press the “<-” key to rotate left and press the “1” key to rotate right.

The Street Defenders have multiple weapons available which are activated by function keys “F1”, “F3”, “F5”, and “F7”. These weapons will damage the nearest enemy as shown in this table. 


Only the Punch is unlimited. However, it only works if the enemy is very close.

Flashing enemies contain “power ups”. These can be collected if the enemy is killed when very close.


How many kills can you get, Street Defender number C-64, before you are “retired”?


 <-- Optional Paypal support for these projects

Link to disk image:

VR64, Virtual Reality Goggles for the Commodore 64


The VR64 project is my attempt to make VR goggles for the commodore 64.


The project started with my 12 year old daughter's science fair.  She studied VR goggles.  We were able to make our own "Google Cardboard" style goggles, 3D images, and even a 3D movie.  Of course we used our smart phones as screens and video cameras.

I kept thinking, why can't this be done for our beloved commodore 64?  So I built the VR64 using three components, a $10 plastic VR goggle, a $32 LCD and a cheap power transformer (plus lots of glue gun fun!).
VR64 Demo Video

I split the screen into two sections, one for the left eye and one for the right.  Each section is 19 columns by 25 rows, and the center two rows are not used.  Each eye, has 152X200 pixels in high resolution and only 76X200 in multi-color mode!


After experimenting, I found that objects at the same location in both eyes looked like a "normal" distance.  If the objects both moved towards the center, through the VR64, the object would appear in the same location but closer to the user!  I found that I could move objects up to 10 pixels towards the center each (20 pixels closer to each other) and maintain the 3D effect.  At a movement of about 13 pixels, my eyes got confused.

At first I was also moving the objects away from the center, but images with objects both away and towards the center were hard to focus on.  After thinking about how the eyes look at objects close and far, it seems obvious that objects far away approach being straight in front of each eye.  When objects are close, each eye sees it as closer to the center.  In no case in reality do the objects move further out.  
Graphic from my daughter's science fair poster!

So I settled on objects at the same center being the furthest out and only moving them both towards the center, up to 10 pixels each, as the 3D effect.  It actually works quite well!

I made a few 3D images from actual camera shots.  They are OK, but not too impressive.  I honestly didn't spend too much time on this.  It may be better to use high resolution dithered images.

Of course you can't have fun on a c64 without playing video games.  So I made a VR64 game.  This is only my third computer game and my second ML/Assembler program.

My VR64 Game is "Street Defender"


I am very happy with the 3D effect of this game!


I have tried to make a video so that people can view this through something like google cardboard or compatible devices.  Hopefully I got the spacing right!

I made it by balancing my phone above the LCD used in the VR64.  Compared to real life, it is worse than what is seen when using the VR64.  It is too washed out in the beginning.  The black background is glowing and not pure black in this video.  Also the text is blurry in this video.  When the game screen comes on, the contrast looks better, but some color is lost.  For instance the moon is much more yellow in the real thing.  However, I hope this gives you a good idea of the 3D effect that is achieved!  Let me know if this doesn't work with your goggles.
Google Cardboard compatible video


Here is my build video of the VR64.  I hope you build your own!  The alignment program is on the "Street Defender" c64 disk. (see link below)
Build Video of VR64

Here is my presentation at the ECCC 2017 / VCFMW 12 show where this was debuted.
Show presentation of the VR64

* UPDATE *
The latest version of the game supports an Atari Driving controller to be used to rotate your view.  Here's a video about it!


 <-- Optional Paypal support for these projects
Free links to components, artwork and VR64 game:

Thursday, October 20, 2016

10 Line BASIC game programming contest


So I entered this contest earlier this year.  The challenge was to create the best game with just 10 lines of BASIC code for any old 8-bit computer.

How hard can that be?  BASIC is like a second language to me.  Well I had no idea how how hard it would be to get some simple functionality and how much time I would ultimately spend on this!

My entry is called "10 RUN 10:AN ENDLESS RUNNER".  (Get it?  10 RUN 10 would be an endless BASIC loop.)  It is inspired by the simple endless runner game that the Chrome browser plays when you have no Internet connection.


My entry... 

10 RUN10:AN ENDLESS RUNNER GAME 

Synopsis 
You run so fast, people say you flash. But on this green field, you have to be careful to jump over the rock boulders and duck under the deadly black birds. How many strides can you score while staying alive? 

Features 
  • c64, VIC 20 and PET versions
  • Space bar to start
  • Joystick up to jump, down to duck (port 2 on c64, 1 and 0 on PET keyboard)
  • Two jump lengths
  • Two "waves" of obstacles (second wave starts at score of 255)
  • Four different death scenes
  • High score
  • Mega jump straight from ducking to jump (useful in the second wave where the objects can be very close together) 

commodore 64 version

VIC 20 version

PET 2001-8N Version


PLAY THE VIC 20 VERSION ON-LINE!
Space to start, Cursor Up / Down for Jump / Duck


I first wrote this for the commodore 64.  Then I 'ported' it to its predecessor, the commodore VIC-20.  It was so much better on the VIC-20!  I was using the PETSCII graphic symbols so they looked much larger on the VIC-20's 22 character wide screen. It also ran faster, probably due to the less characters it needed to repaint each cycle.  I actually had to add a delay!  This is a 1MHz 8-bit processor running an interpreted language!  (I also created a PET 2001 version for kicks but it's quite slow)

Here's an image of the VIC 20 program listing.  I entered the
PUR-80 part of the contest, so each line could only be a maximum of 80 characters.  However, you are allowed to use shortcuts for the keywords to get more to fit.  Honest, these all fit when the commands are shortcuts!

Program listing
Full size view of program listing


Contest Results??

I got 5th place!!  I was very happy with that.
http://gkanold.wixsite.com/homeputerium/results-2016


We'll see if I do this again next year...


Downloads / Online discussion links

Here's the files in a .d64 format if anyone wants to try any these on their equipment / emulators.
http://cloud.cbm8bit.com/jim_64/10%20line%202016%20-%20VIC%2020%20-%20c64%20-%20PET%202001-8N.d64

If your loading from tape on the VIC 20, use this file (and leave the play button pressed down after the load)
http://cloud.cbm8bit.com/jim_64/10rU10-vic-tap-p.prg

(For those true commodore geeks)
Obligatory CSDB entry...
http://csdb.dk/release/?id=150281

Lemon discussions start at...
http://www.lemon64.com/forum/viewtopic.php?p=725863#725863

Saturday, September 12, 2015


cOS has been released for the commodore 64!


This project started as a simple experiment to see if I could create a "modern" looking graphical user interface for the commodore 64.

Once I got the basic user interface working, I decided to add an optional touch screen. It pretty much works! Of course cOS can still be operated by a standard joystick or the cursor keys.

I then decided to create a Test / Demo 5.25" disk that would have a similar feel as a basic tablet. I ended up adding pictures, songs, games, and some typical iPad style apps. These disks only hold 170k of data! So, I used a 80's disk notcher to make a "flippy" 2-sided disk. I then had a whopping 340k of space to fill up.

The iPad style apps are mostly gags for fun.  Yes, there are real internet programs for the commodore 64 (IRC clients, twitter client, contiki web browser, etc.) but they are typically large and require specific hardware.  Who could resist Microsoft's insistence that I include IE 6 (running on Windows 9)!  There's also a cBooks app that links to all the books you'll need.  Of course these devices need a sassy assistant.  I pulled together some 80's technology to create SAM-Siri.

If you have a real commodore 64 or want to try it out in an emulator, here are links to the disk images for sides A and B of the Test/Demo disk.


 <-- Optional Paypal support for these projects
 
Disks Link:
http://csdb.dk/getinternalfile.php/141720/cOSv1.zip